Hosting Your Own Server: Difference between revisions
(Created page with "If you're tired of our official servers, you're always free to <b>host your own server</b> and add any content you desire (as long as our server supports it, of course). This article will guide you through the steps you need to take in order to create and host your own MWO server for you and your friends to play on. <h1>Prerequisites</h1> <ul> <li>A PC running Windows or Linux</li> <li>A router capable of port forwarding to make sure other people ca...") |
No edit summary |
||
| Line 28: | Line 28: | ||
Once you've launched the server, you should see its console logs in their entirety. In a freshly launched server, the latest line of the logs will include your server's port. <b>You must FORWARD THAT PORT</b> AND <b>that port + 1</b> if you want your server to accept non-local connections. (In simpler words: if you see <b>1551</b>, forward <b>1551 AND 1552</b>!) | Once you've launched the server, you should see its console logs in their entirety. In a freshly launched server, the latest line of the logs will include your server's port. <b>You must FORWARD THAT PORT</b> AND <b>that port + 1</b> if you want your server to accept non-local connections. (In simpler words: if you see <b>1551</b>, forward <b>1551 AND 1552</b>!) | ||
<br> | <br> | ||
At this point, you should be able to join the server | At this point, you should be able to join the server via adding <code>127.0.0.1</code> in the MWO Launcher, using your account from official MWO servers. Check out the <b>Customizing the Server</b> section to learn how to change your server's name, ports, settings, timecycles, accounts, mods and much more! | ||
[[File:ServerConsoleScreenshot.png|300px|thumb|right|If you did everything right, you should see something similar once you launch the server. Note the port!]] | [[File:ServerConsoleScreenshot.png|300px|thumb|right|If you did everything right, you should see something similar once you launch the server. Note the port!]] | ||
Revision as of 10:12, 23 January 2022
If you're tired of our official servers, you're always free to host your own server and add any content you desire (as long as our server supports it, of course). This article will guide you through the steps you need to take in order to create and host your own MWO server for you and your friends to play on.
Prerequisites
- A PC running Windows or Linux
- A router capable of port forwarding to make sure other people can access your server
- A basic understanding of JSON configs
Downloading the Server
Once you've downloaded the server archive, unpack it somewhere and move on to the Running the Server section.
Running the Server
-
You can double-click the mwo-server executable to do the trick or run it through the console using
./mwo-serverin the server directory. -
You can pass
--config-path=[YOUR CONFIG FILE PATH]and/or--log-path=[YOUR LOG FILE PATH]as command-line arguments to mwo-server in order to make the server use different config and/or log files.
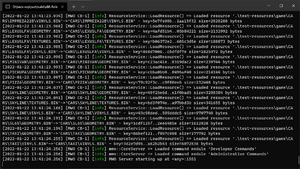
Once you've launched the server, you should see its console logs in their entirety. In a freshly launched server, the latest line of the logs will include your server's port. You must FORWARD THAT PORT AND that port + 1 if you want your server to accept non-local connections. (In simpler words: if you see 1551, forward 1551 AND 1552!)
At this point, you should be able to join the server via adding 127.0.0.1 in the MWO Launcher, using your account from official MWO servers. Check out the Customizing the Server section to learn how to change your server's name, ports, settings, timecycles, accounts, mods and much more!
Customizing the Server
Now that you have an MWO server running, it's time to change it to better suit your needs. After all, it's literally just named A MWO Server at this point: who wouldn't want to change that?!
Server Config
In order to change your server's settings, you should look no further than the core-server.json file. It contains all of the customization settings that you can (and probably should) change. (Look into the Server Configuration Summary for a near-complete explanation of the file's contents)
The server config file is written in JSON, and the server executable will expect it to be valid JSON. The rest of this article assumes you're at least somewhat acquainted with JSON: if not, you really should learn more about it!
Changing the server's Name, Description and Port
Name & Description
Right at the top of the config file are the serverName and serverDescription fields. You may change them to anything you like: the changes to the config file will only take effect once you restart the server though, so keep that in mind.
Ports
A bit lower is the gamePort field: it defines the main network port of the server. If you plan on running more than one MWO server on your machine, consider changing it to keep it unique for every server instance. Set to 1551 by default, you may change it to any value you like. (You WILL have to also change the apiPort field in the webApi section to a port higher by 1 than the game port in order to keep the server working properly!)
